
How to Configure RAID HDD on IBM Power System for AIX OS
/ 3 min read
Updated:
Table of Contents
Intro
Before installing AIX OS, we need to configure RAID HDD first. This is because AIX OS requires a RAID configuration to be installed. In this guide, we will use RAID 5 configuration.
Steps
- Connect the server power cable to the power source
- Turn on the server first
- Make sure the monitor, keyboard, and mouse are connected to the server
- Check the VGA compatibility between the server and the monitor
-
Insert the AIX Utility RAID CD/DVD
-
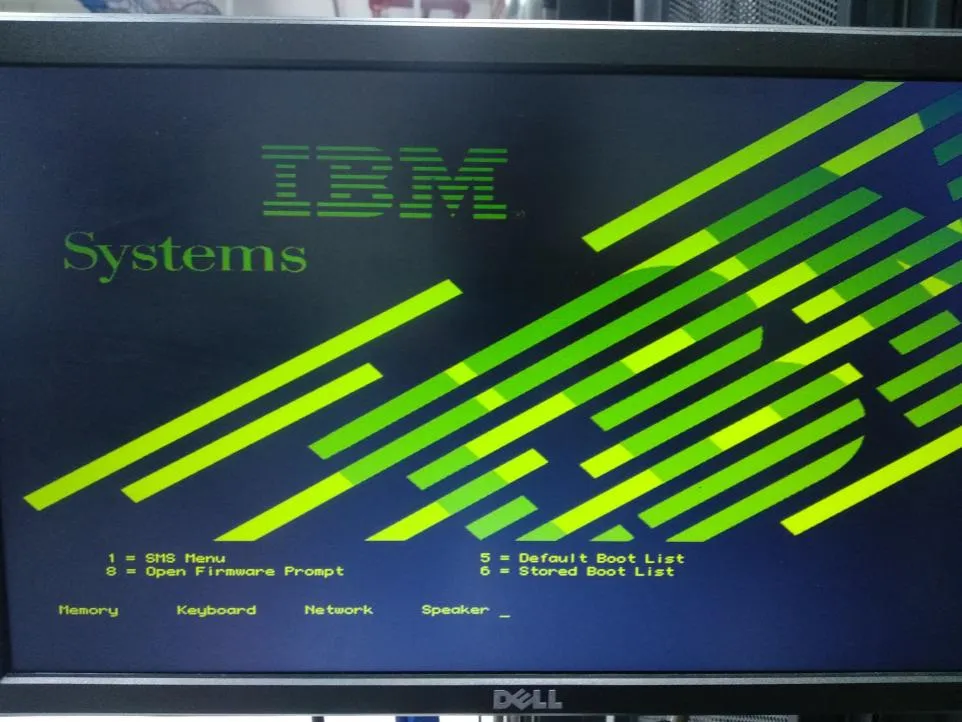
After the server turns on, the following display will appear:
-
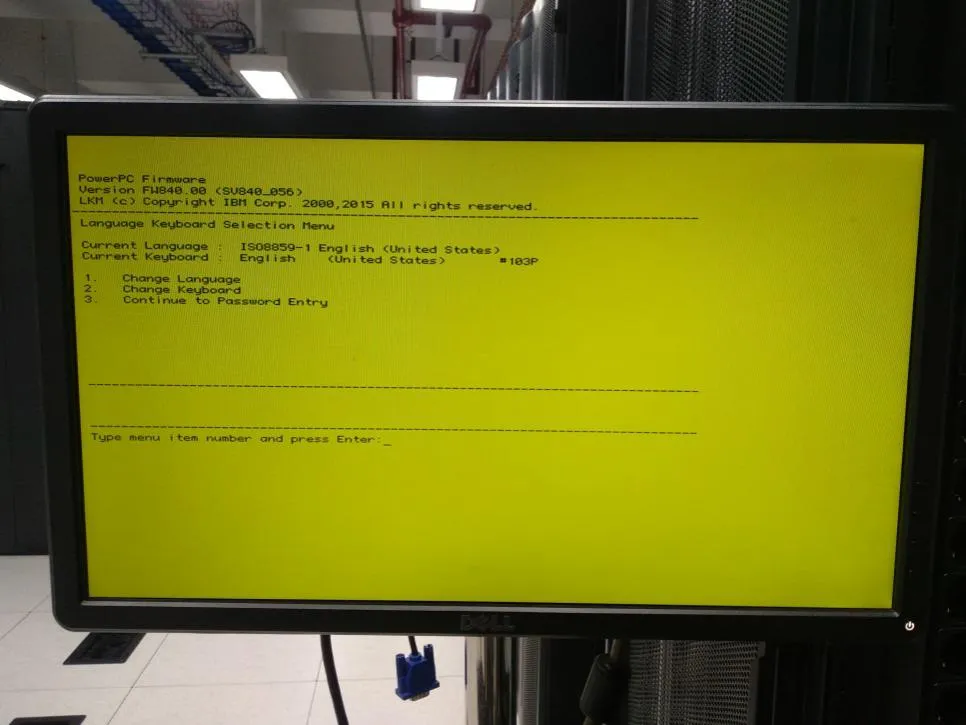
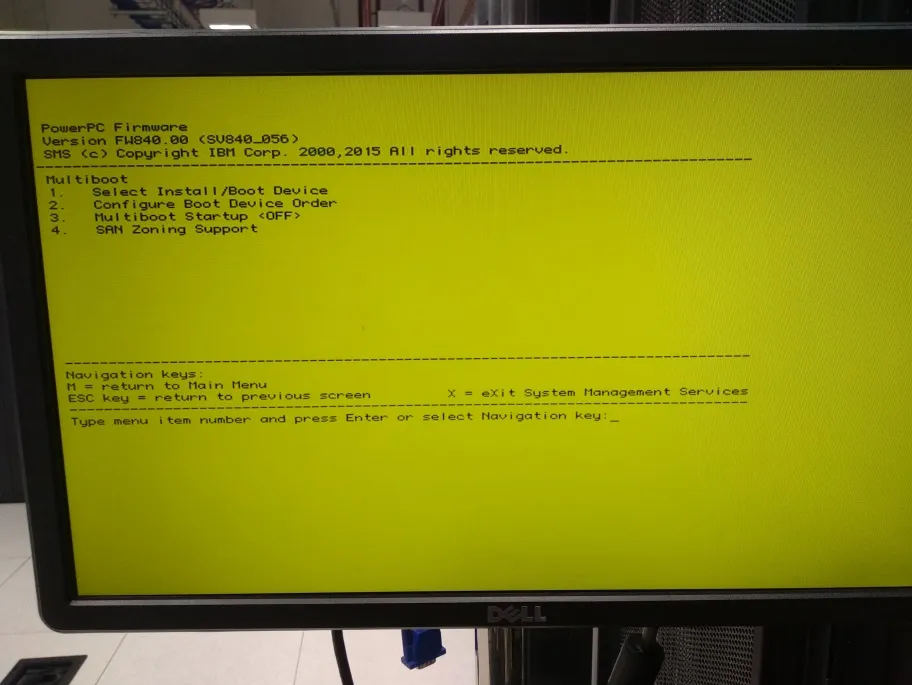
Press 1 to select the next step to “SMS Menu”
-
Press 3 to select the next step to “Continue to Password Entry”
-
Type the default password “admin”

-
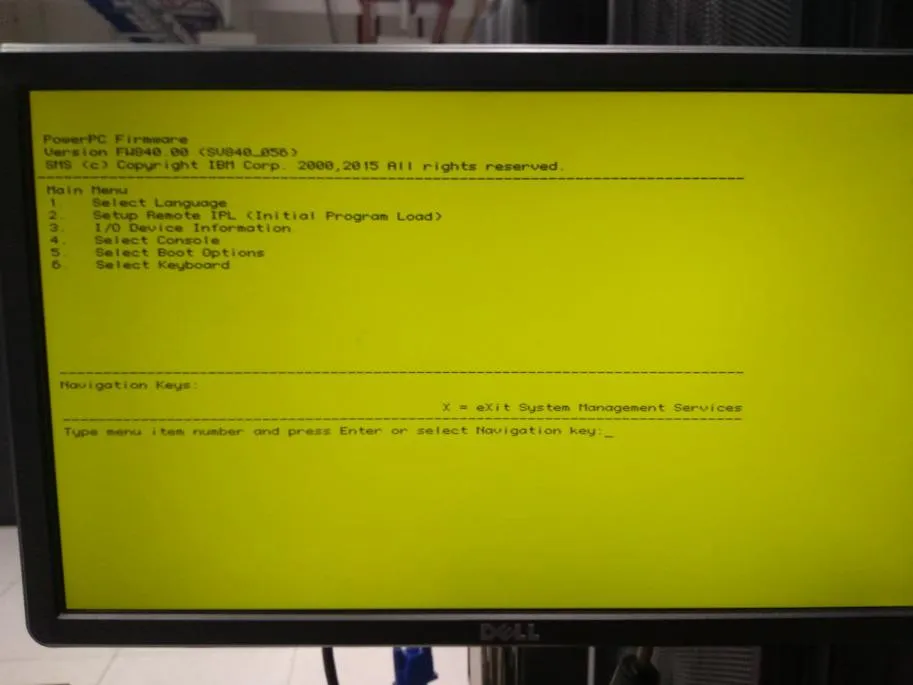
Press 5 to continue to “Select Boot Options”
-
Press 1 to continue to “Select Install/Boot Device”
-
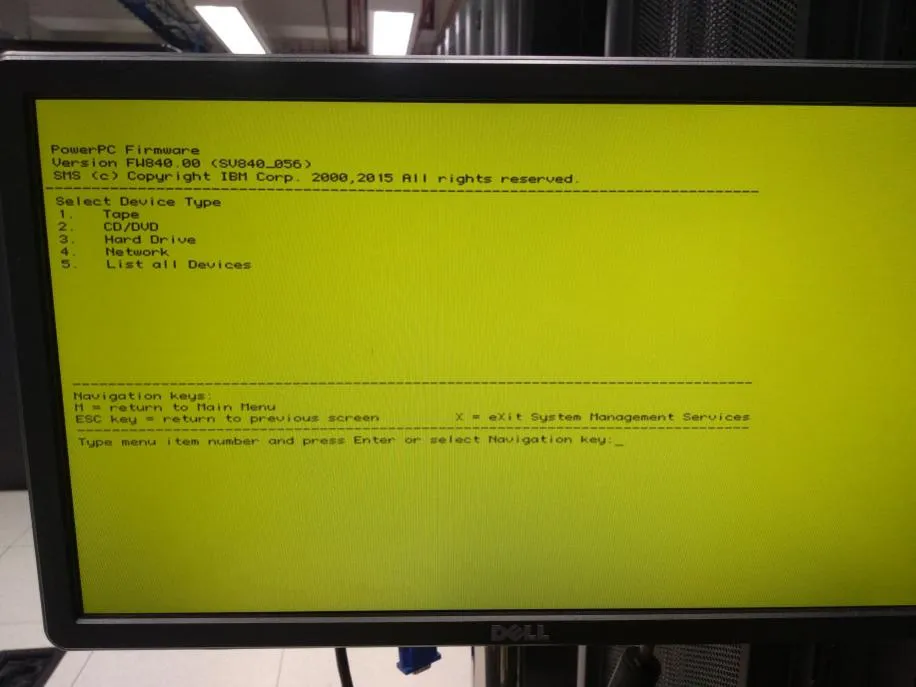
Since this guide uses a CD/DVD device, press 2 to select “CD/DVD”
-
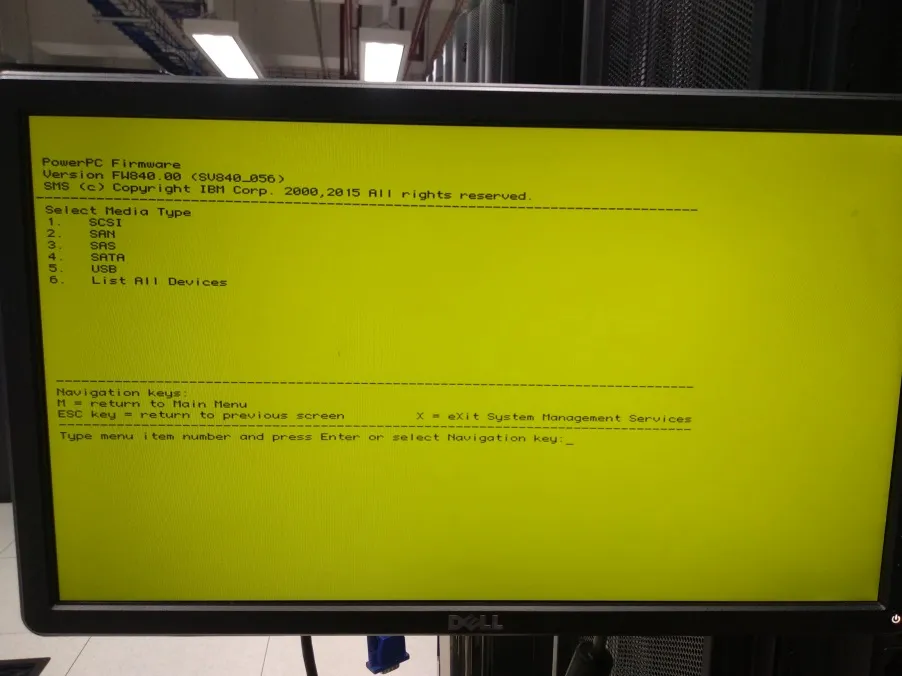
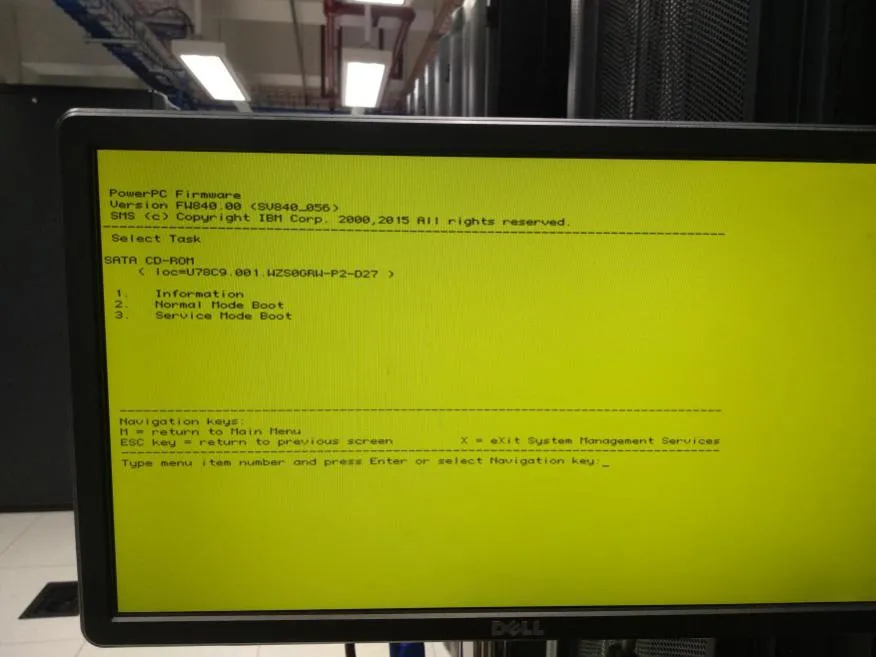
Press 6 to select “List All Devices”
-
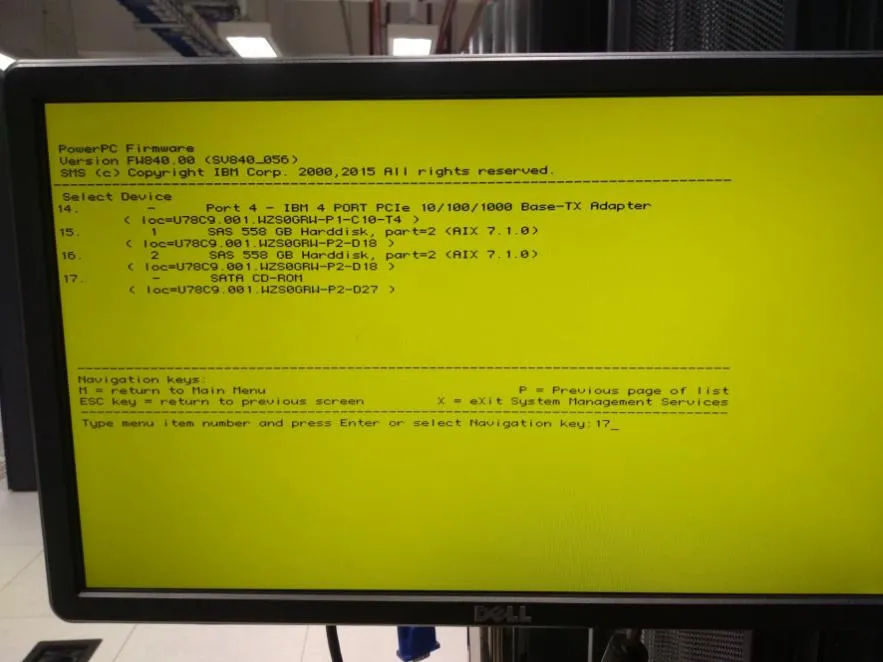
Select “SATA CD-ROM” because the device used is CD/DVD, in this guide it is at number 17
-
Press 2 to select “Normal Mode Boot”
-
The next step is a reboot process, here is the display:
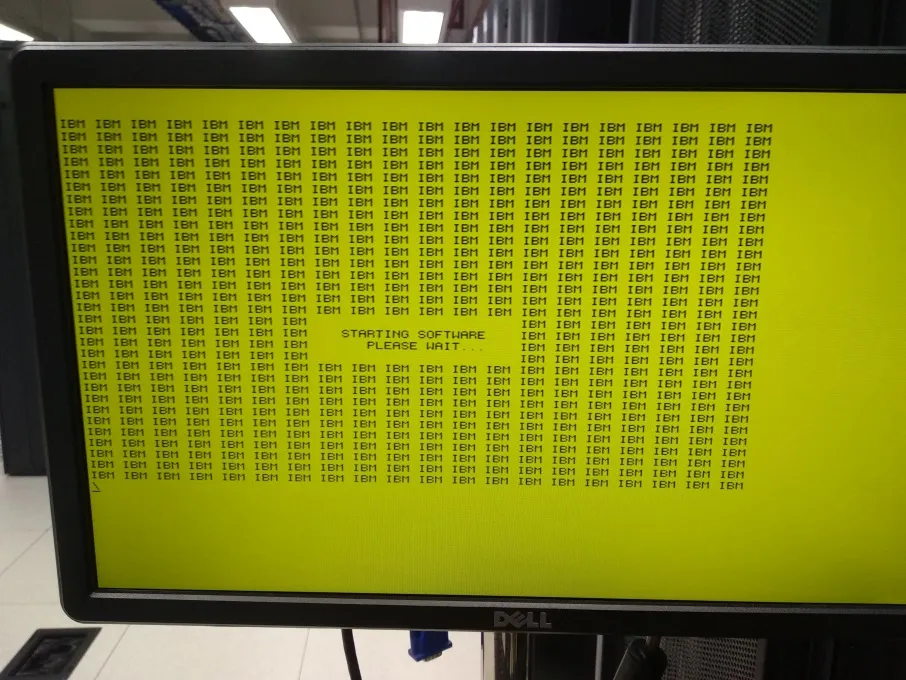
-
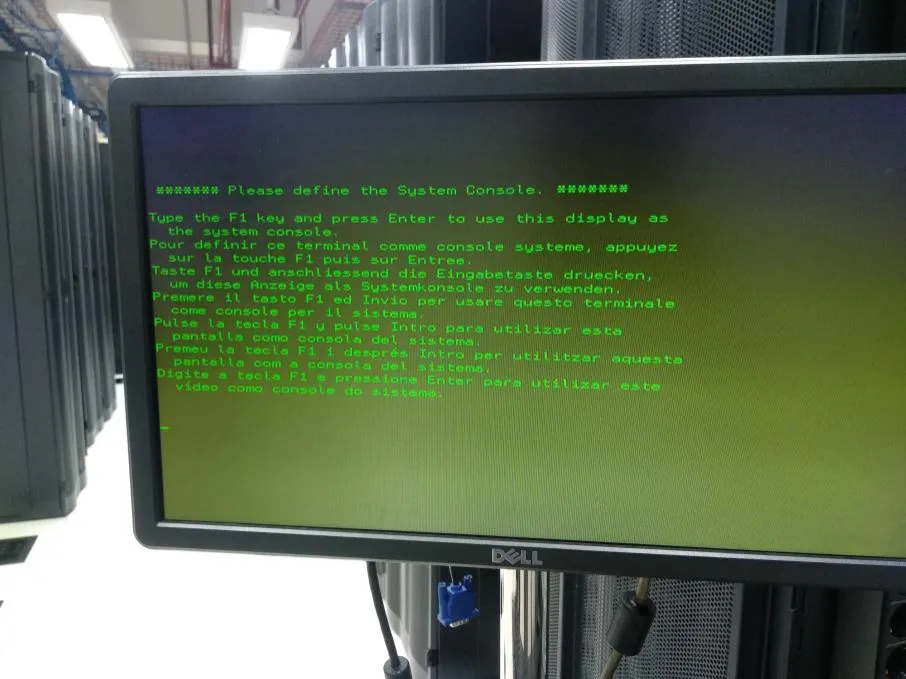
After the reboot process is complete, press F1 and press Enter
-
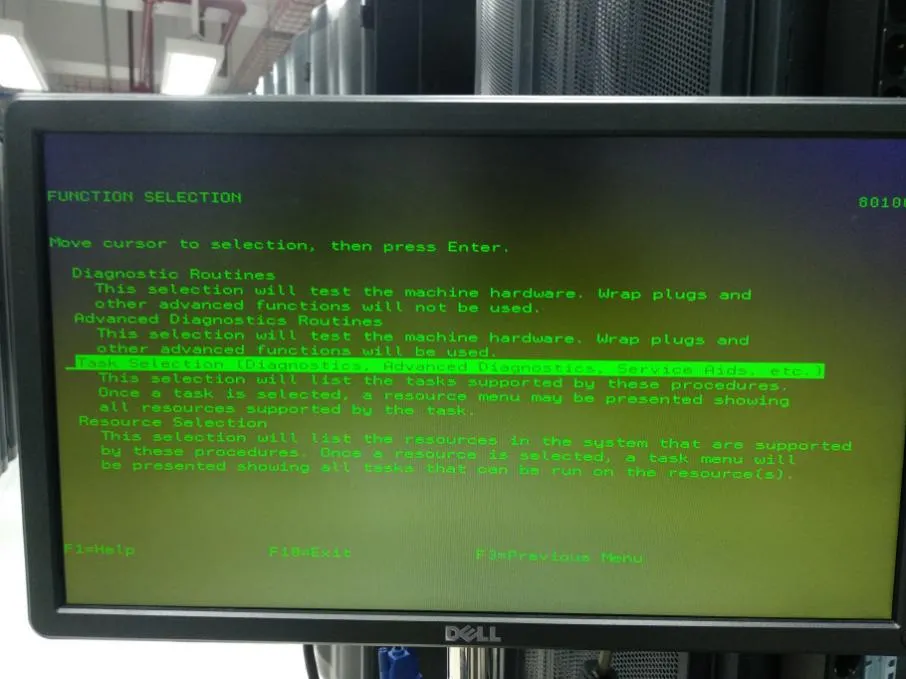
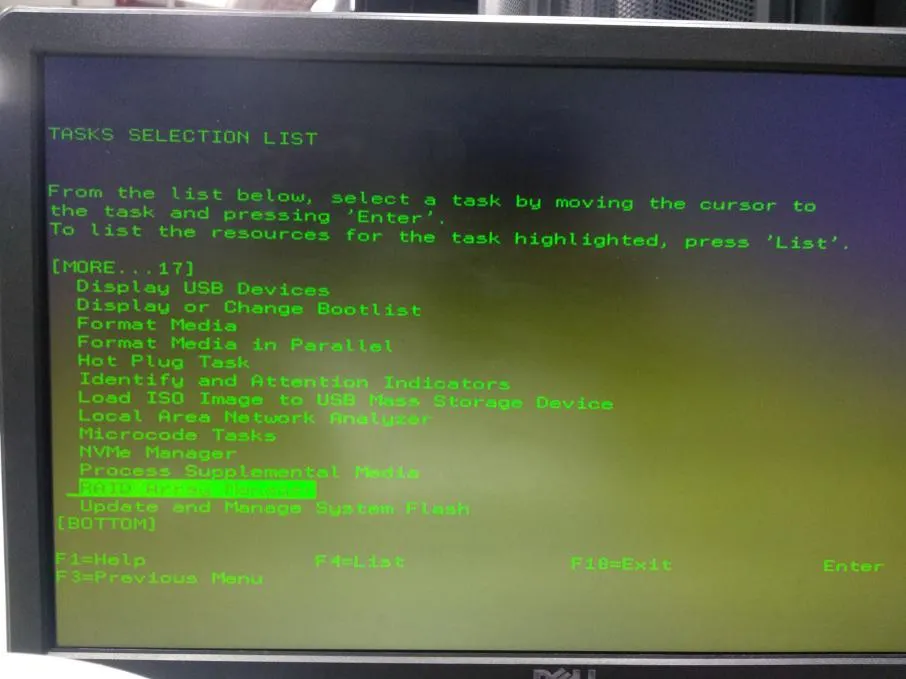
Select “Task Selection (Diagnostics, Advanced Diagnostics, Service Aids, etc.)”
-
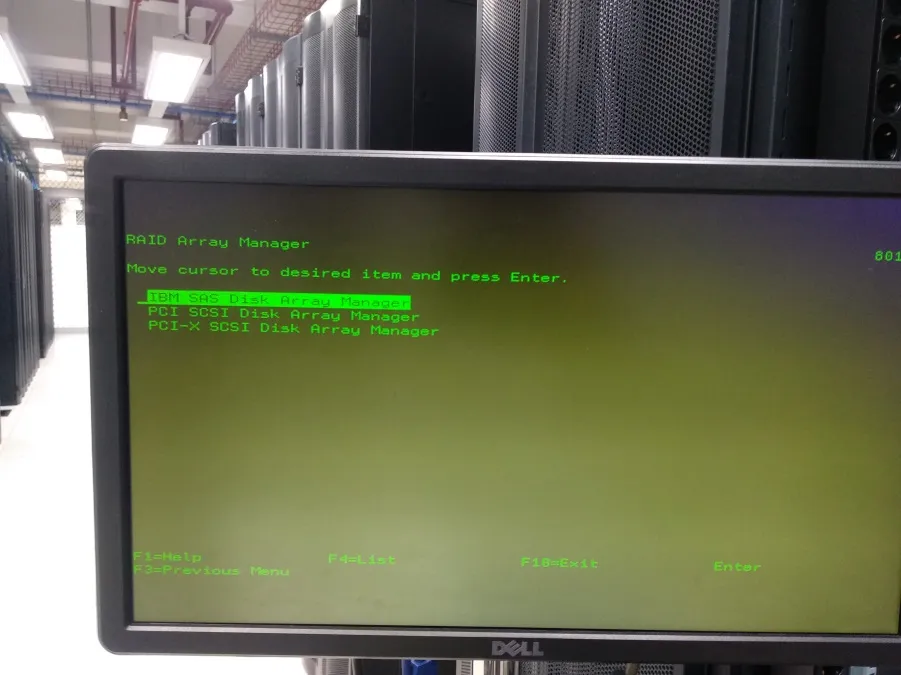
Select “RAID Array Manager”
-
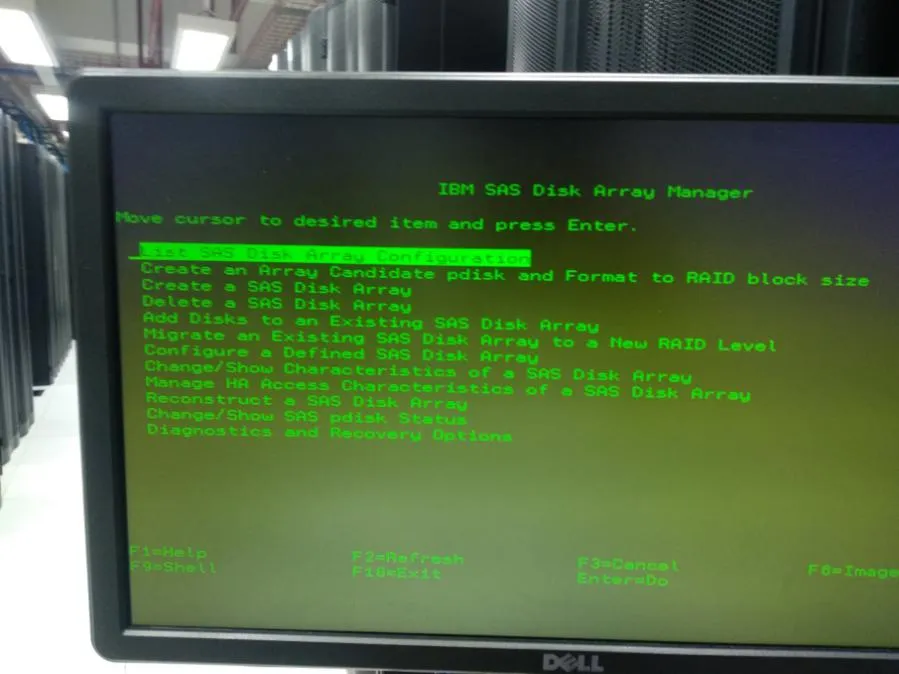
Select “IBM SAS Disk Array Manager”
-
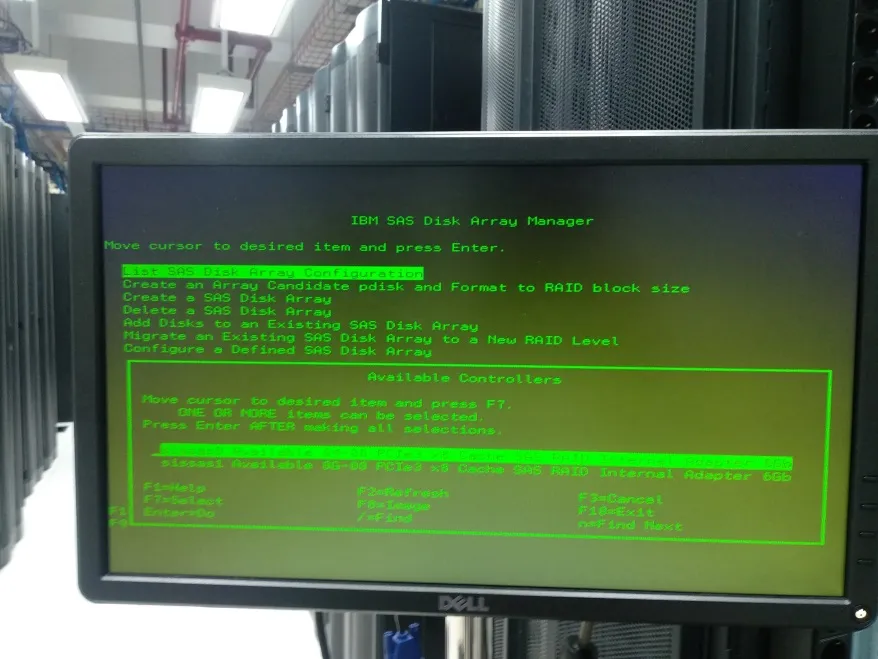
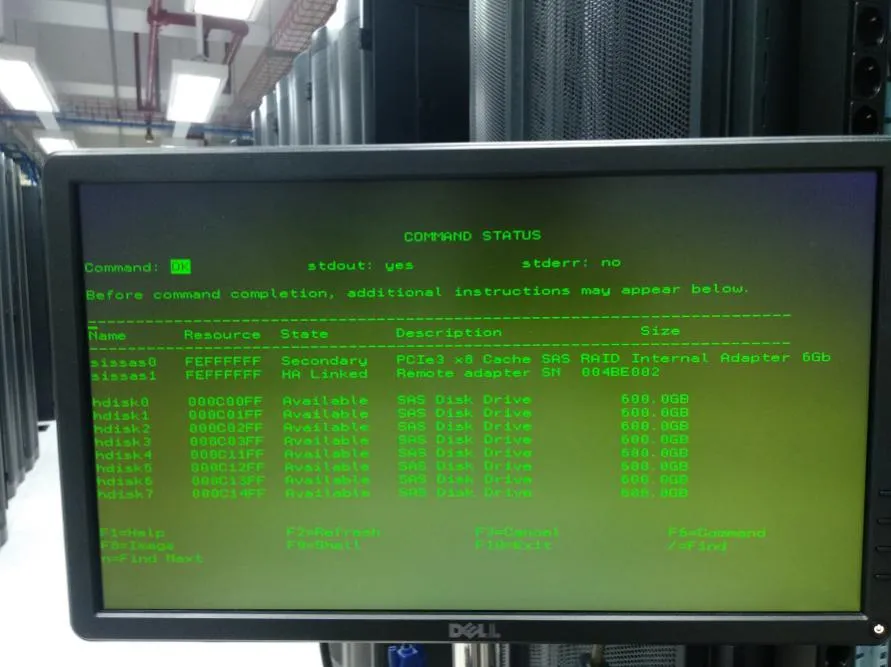
Select “List SAS Disk Array Configuration” to see the default Disk Array configuration
-
Select “sissas0” or “sissas1” according to the available RAID Available Controller inside
-
After opening the available RAID Controller, press F3 to return to “IBM SAS Disk Array Manager”
-
Next, select “Create an Array candidate pdisk and Format to RAID block size”
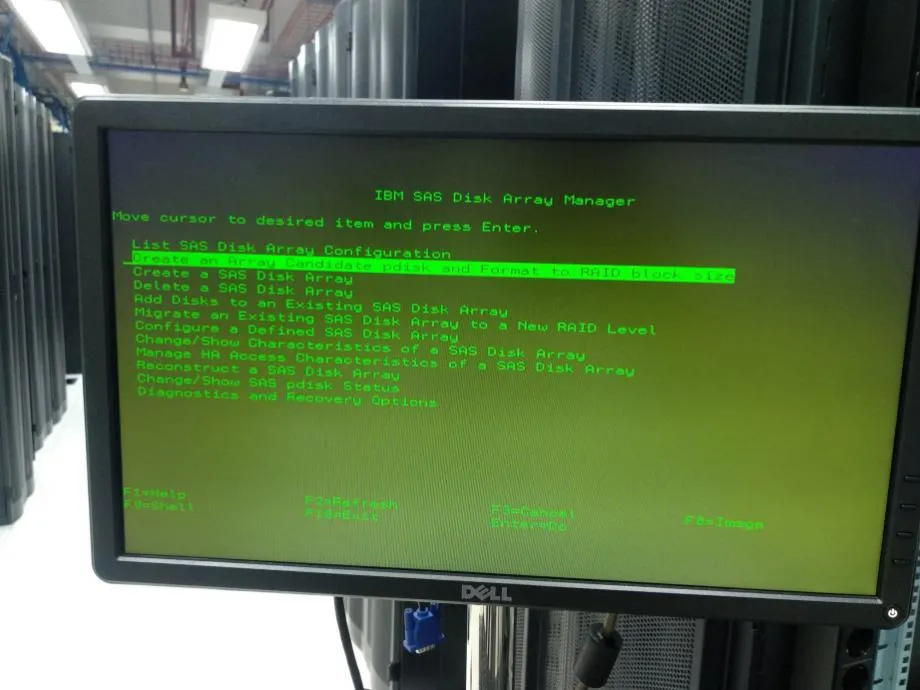
-
Select “sissas0” or “sissas1” according to the available RAID Available Controller inside
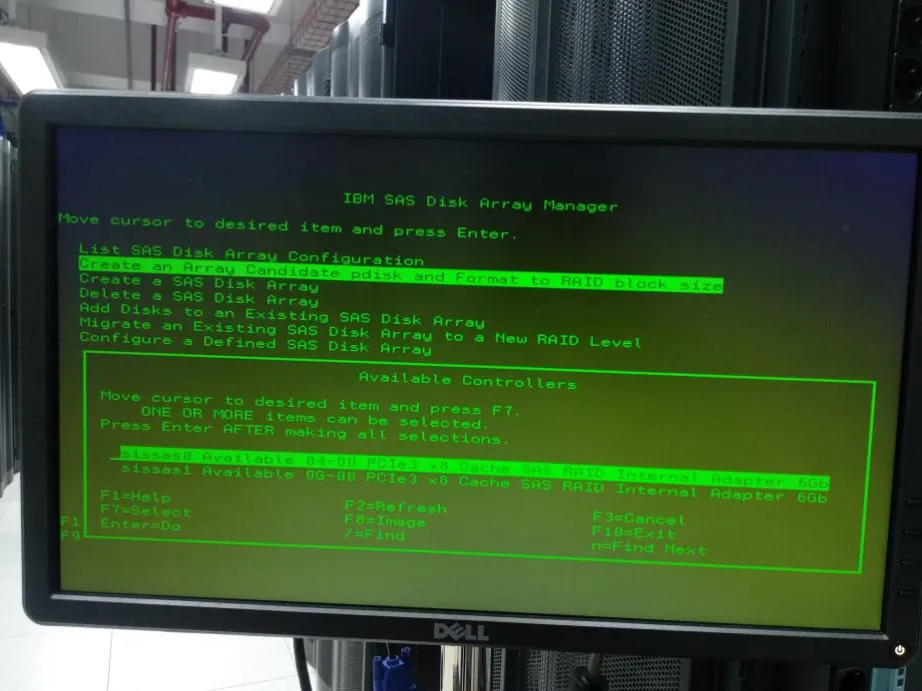
-
Press F7 to mark all available “hdisk”, then press Enter
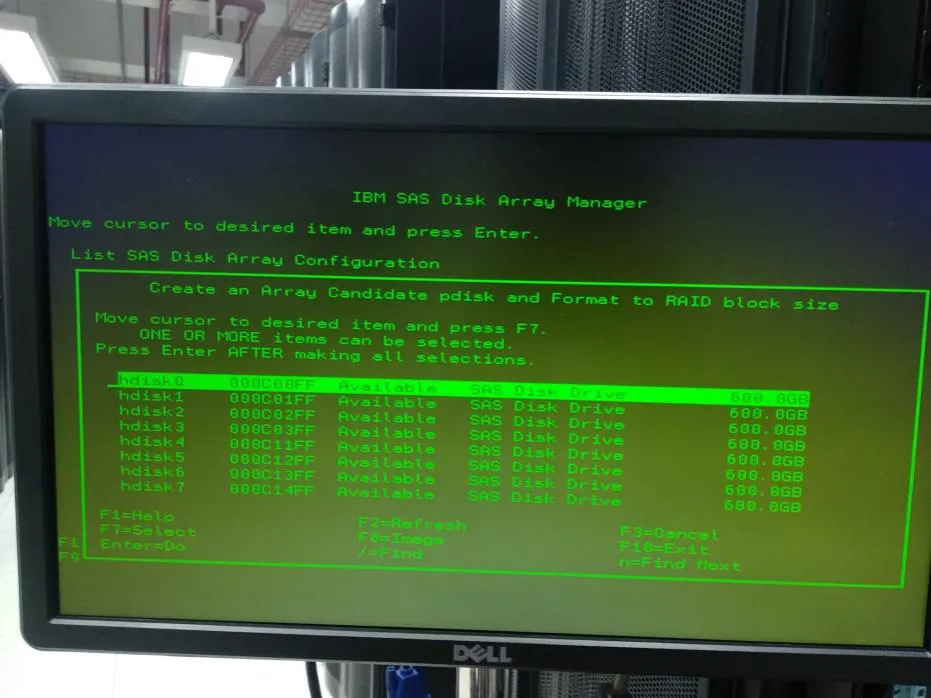
-
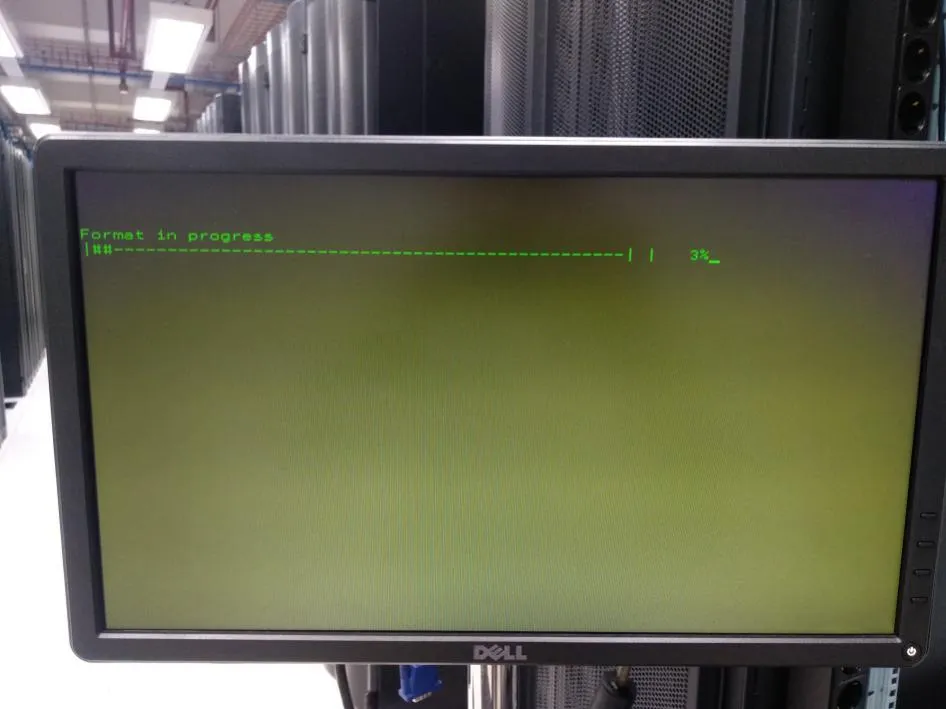
The next step is a format process, here is the display when the format process is in progress:
-
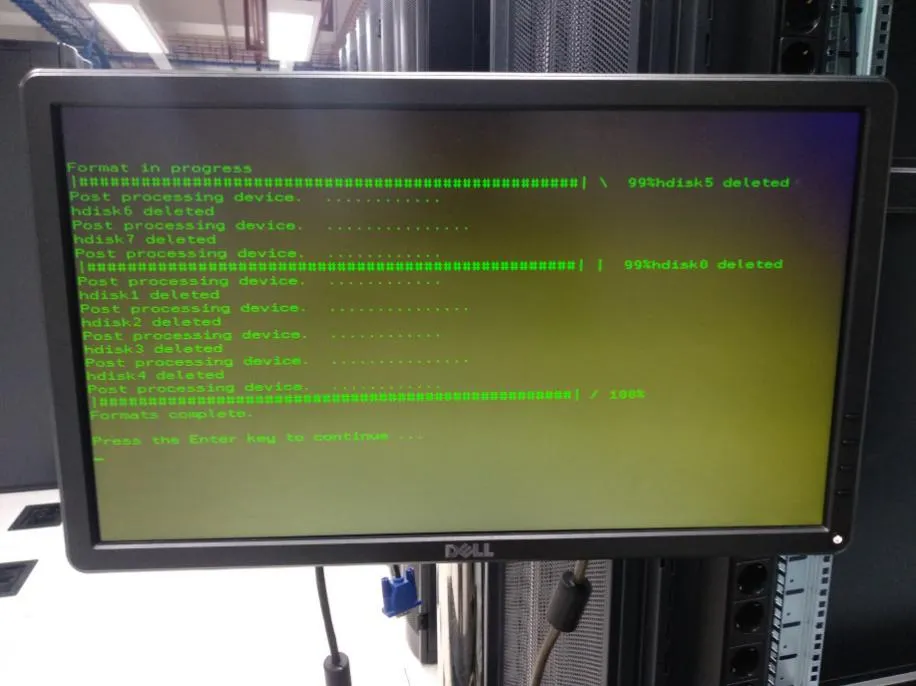
Here is the display when the format process is complete:
-
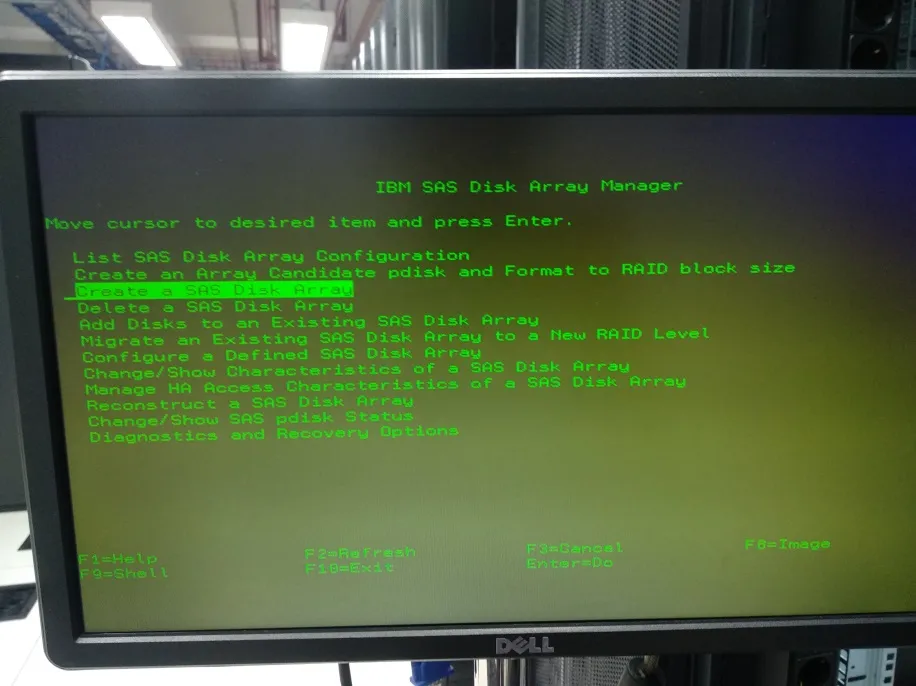
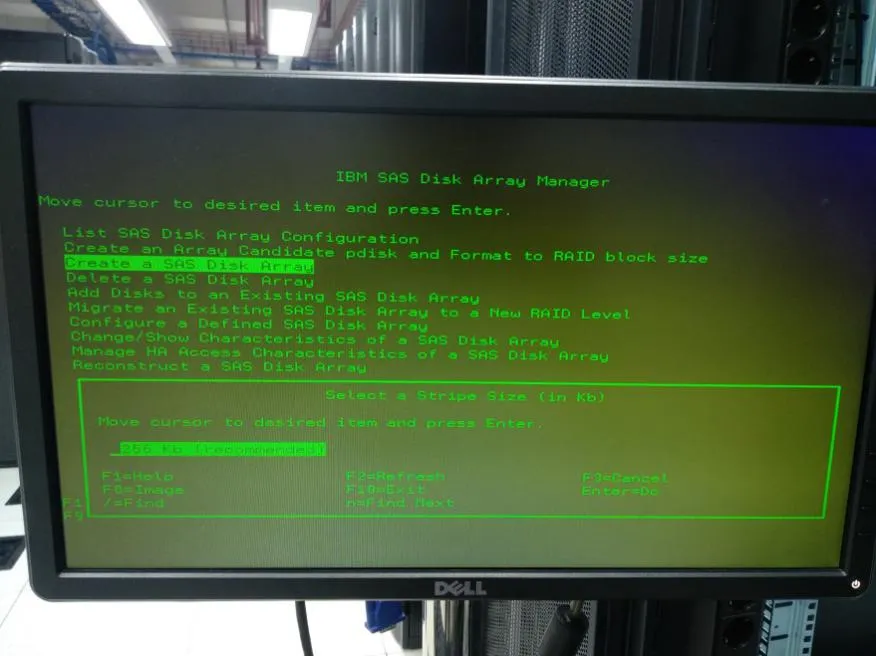
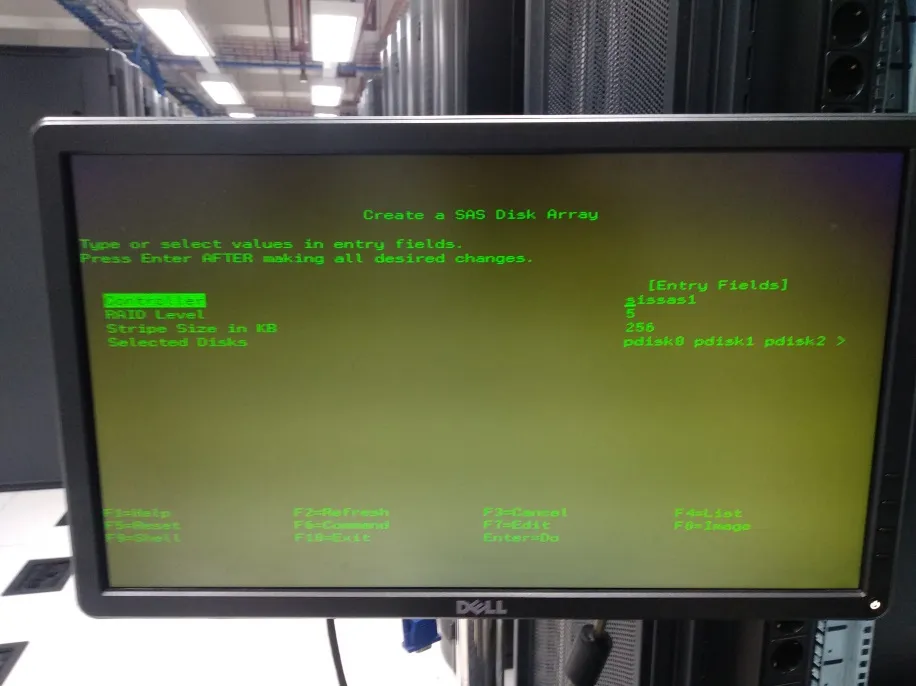
The next step to create a RAID Disk, select “Create a SAS Disk Array”
-
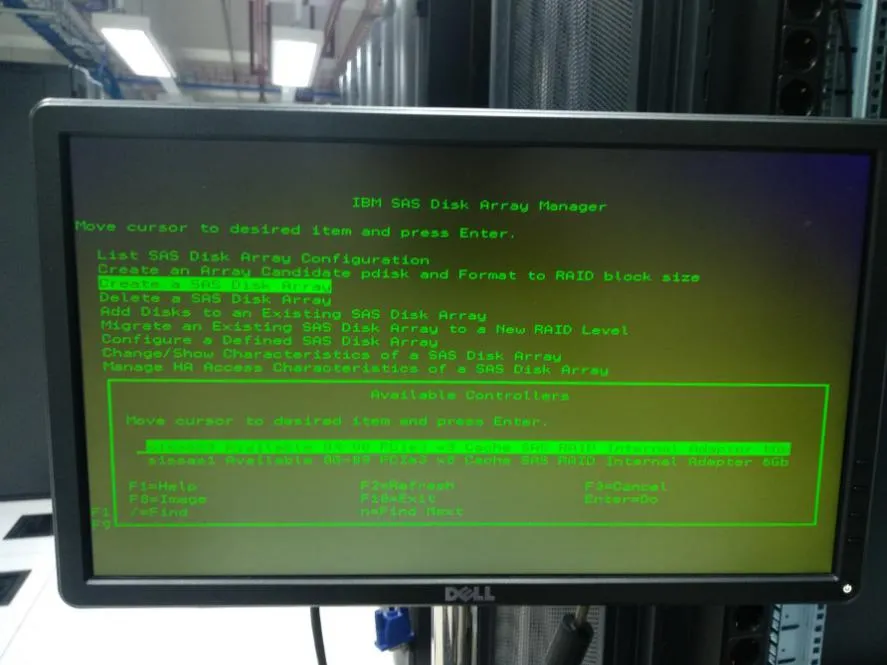
Select “sissas0” or “sissas1” according to the available RAID Available Controller inside
-
Select the recommended RAID level 5, then press Enter

-
Select Stripe Size “256 Kb”
-
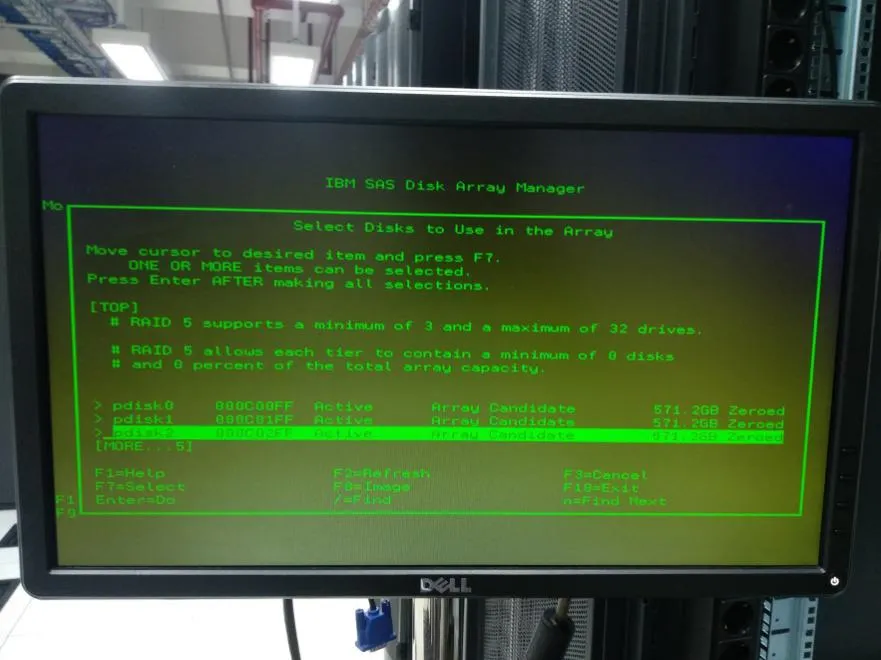
Press F7 to mark all available pdisks, then press Enter
-
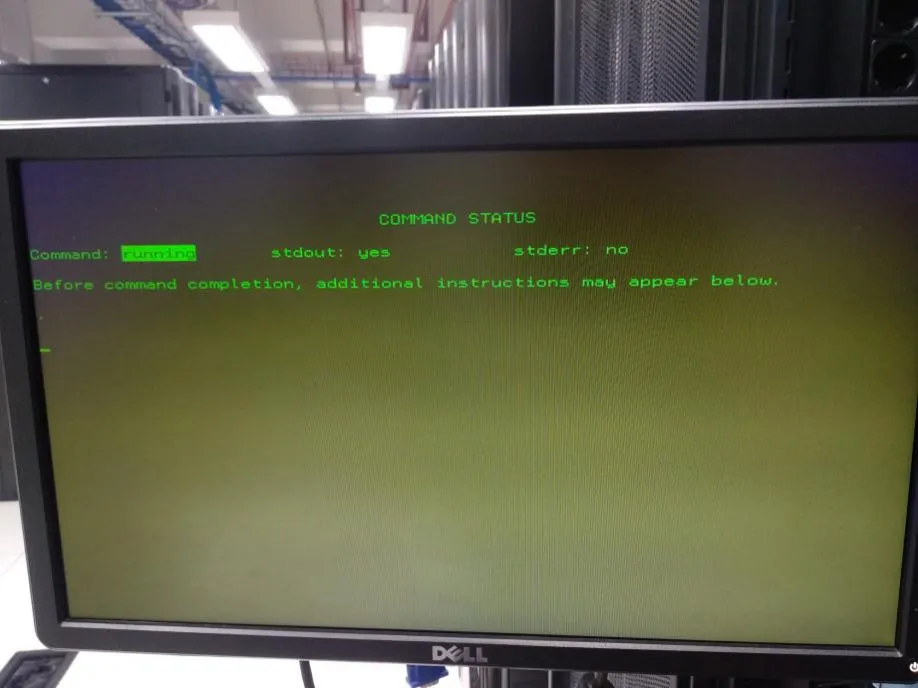
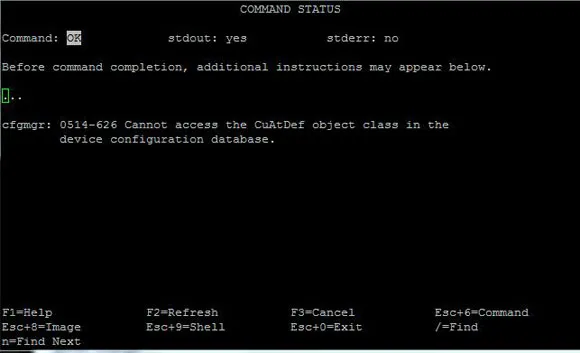
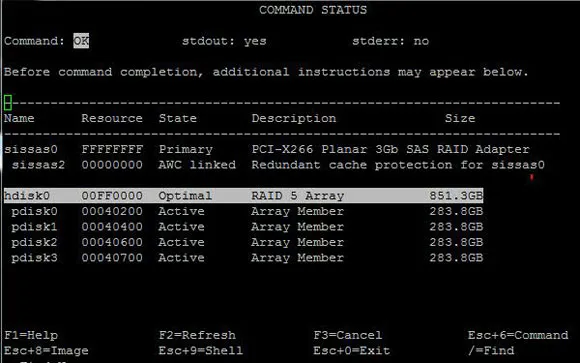
After the above process is complete, check “List SAS Disk Array Configuration” again
-
The hard disk is now in RAID condition and ready for the OS installation process. After the process is complete, remove the AIX Utility RAID CD/DVD and insert the AIX CD/DVD