
How to Setup DNSSEC on Cloudflare and Porkbun
/ 2 min read

Photo by Taylor Vick / Unsplash
Table of Contents
Intro
DNSSEC is a security extension of DNS that provides cryptographic authentication of DNS data. It helps to make sure the DNS data is not tampered or spoofed.
DNSSEC relies on a chain of trust, where each DNSSEC-enabled resolver validates the DNSSEC records of the authoritative DNS server, and so on, up to the root zone.
It helps to prevent DNS cache poisoning or DNS spoofing, and DNS man-in-the-middle attacks.
Setup
Cloudflare
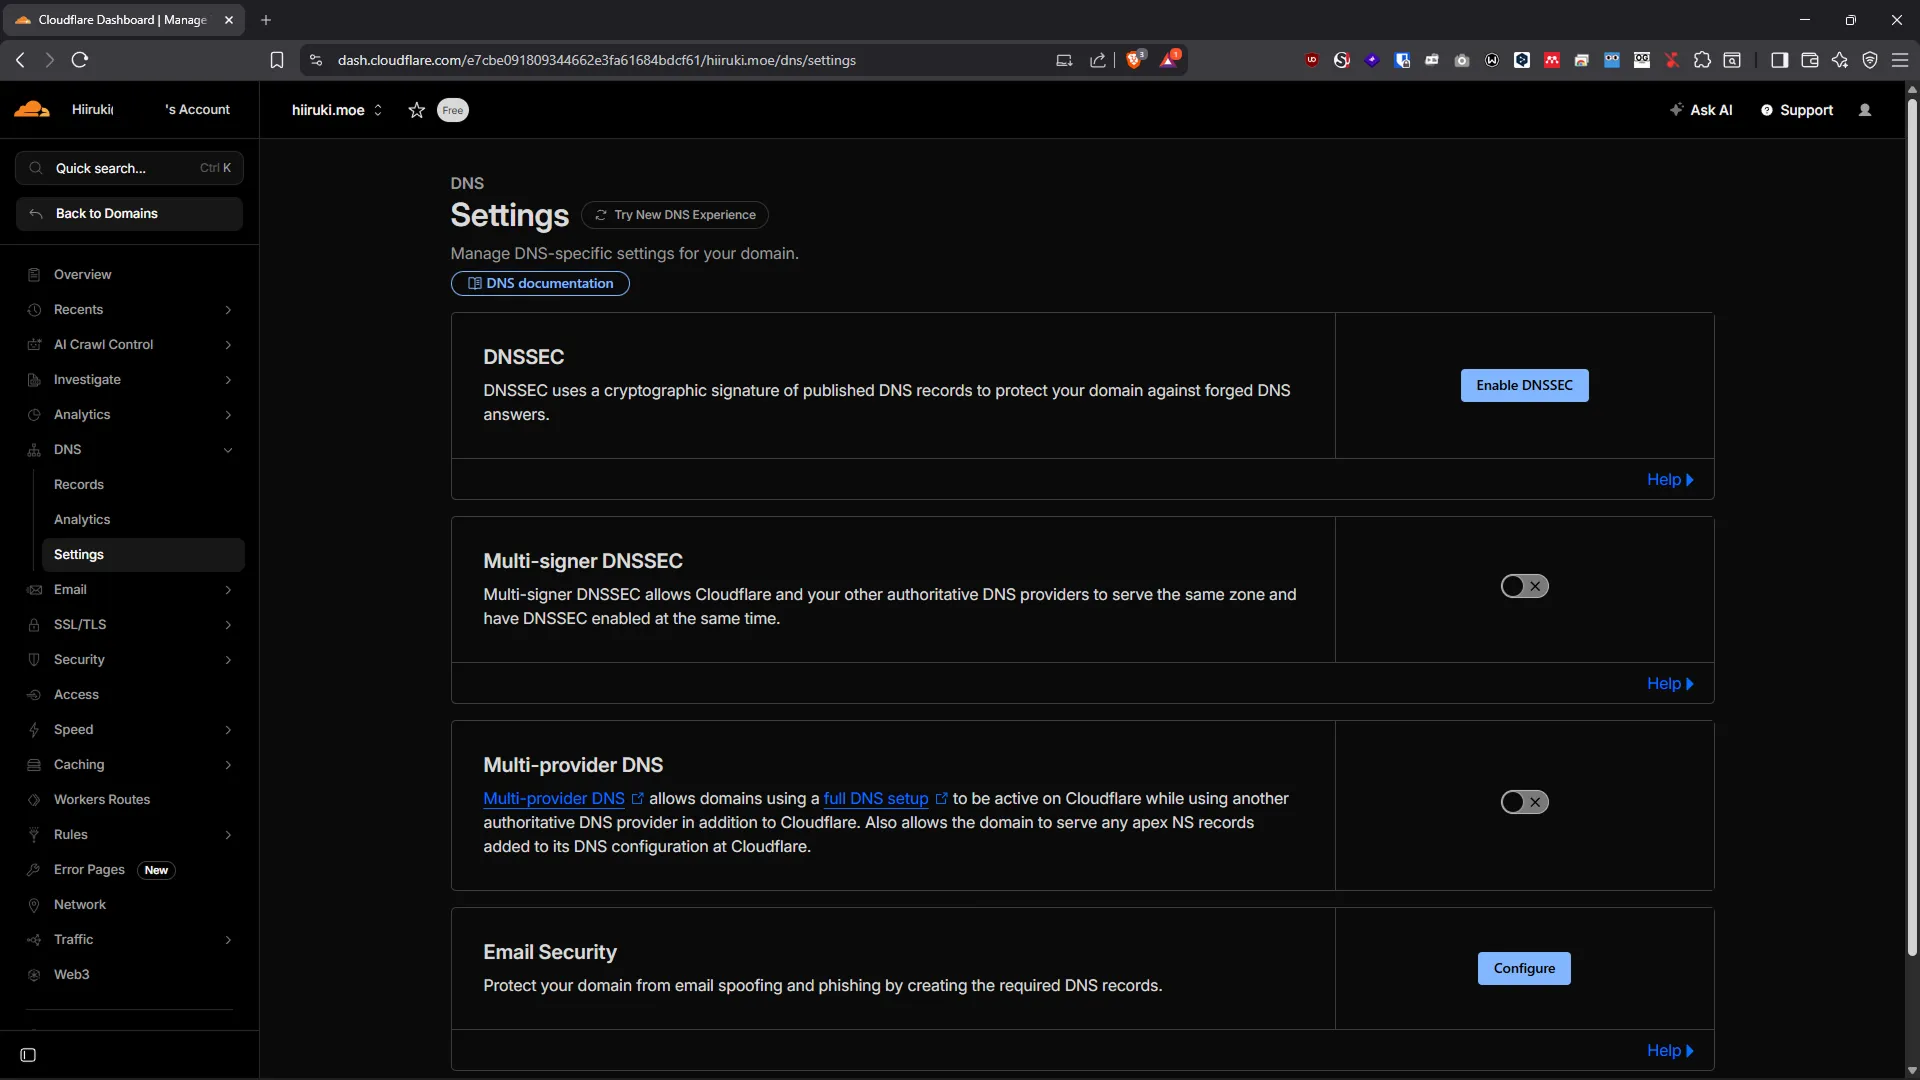
- Log in to Cloudflare dashboard
- Select your domain in “Domains” section
- Select “DNS” in sidebar
- Click on “Settings”
- Enable DNSSEC
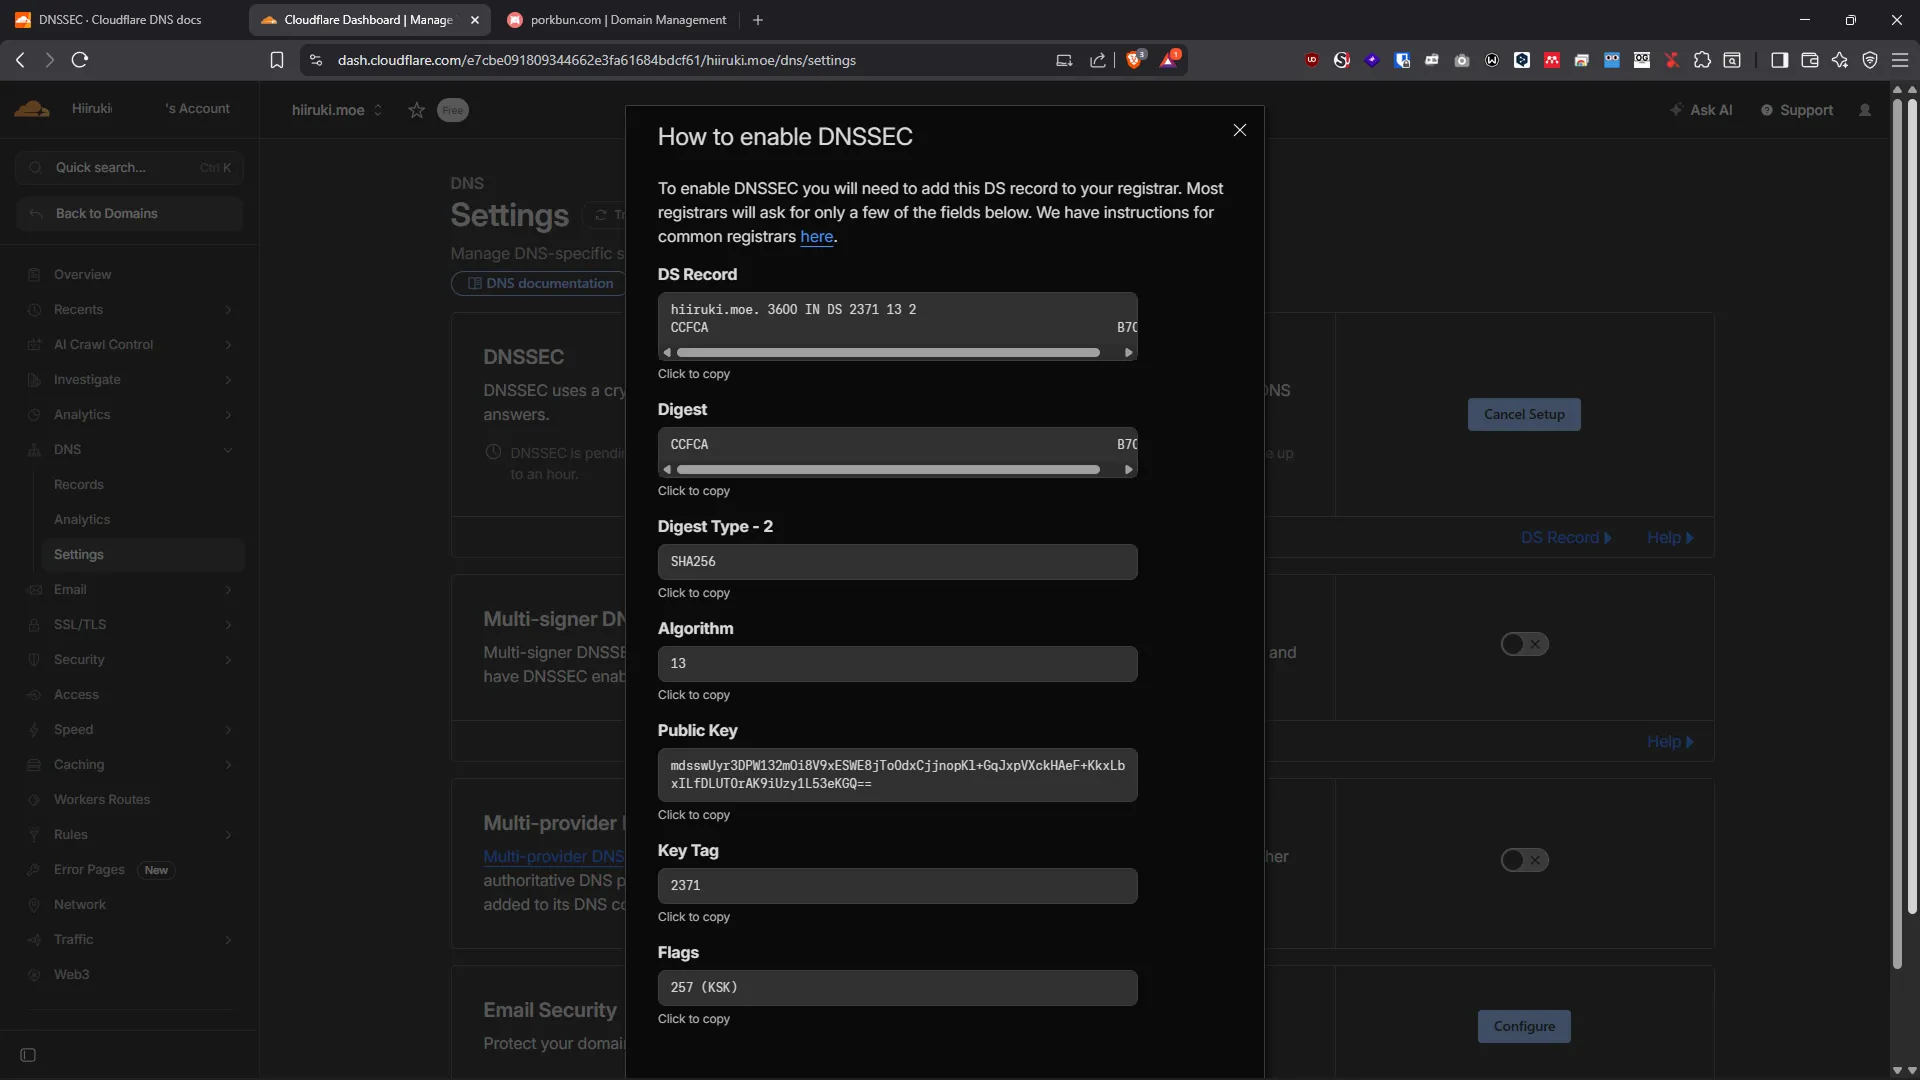
- Copy the DS records
Porkbun
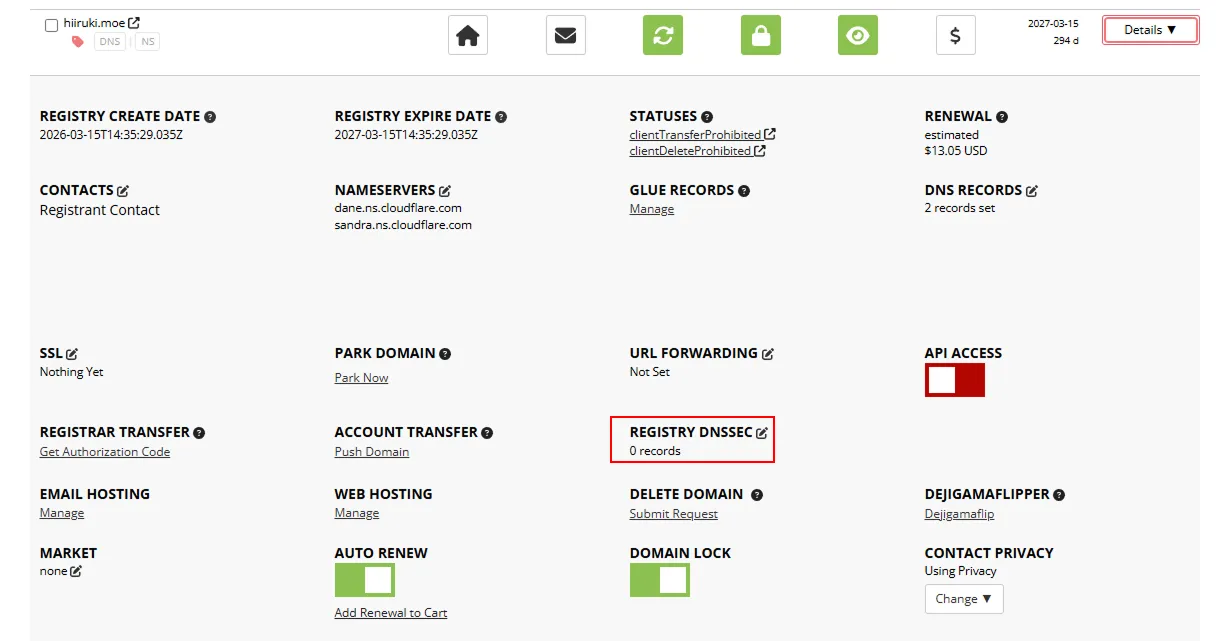
- Log in to Porkbun dashboard
- Select Domain Management in “ACCOUNT”
- Edit the “REGISTRY DNSSEC” settings by clicking the “Edit” button
- Fill in the DS records from Cloudflare
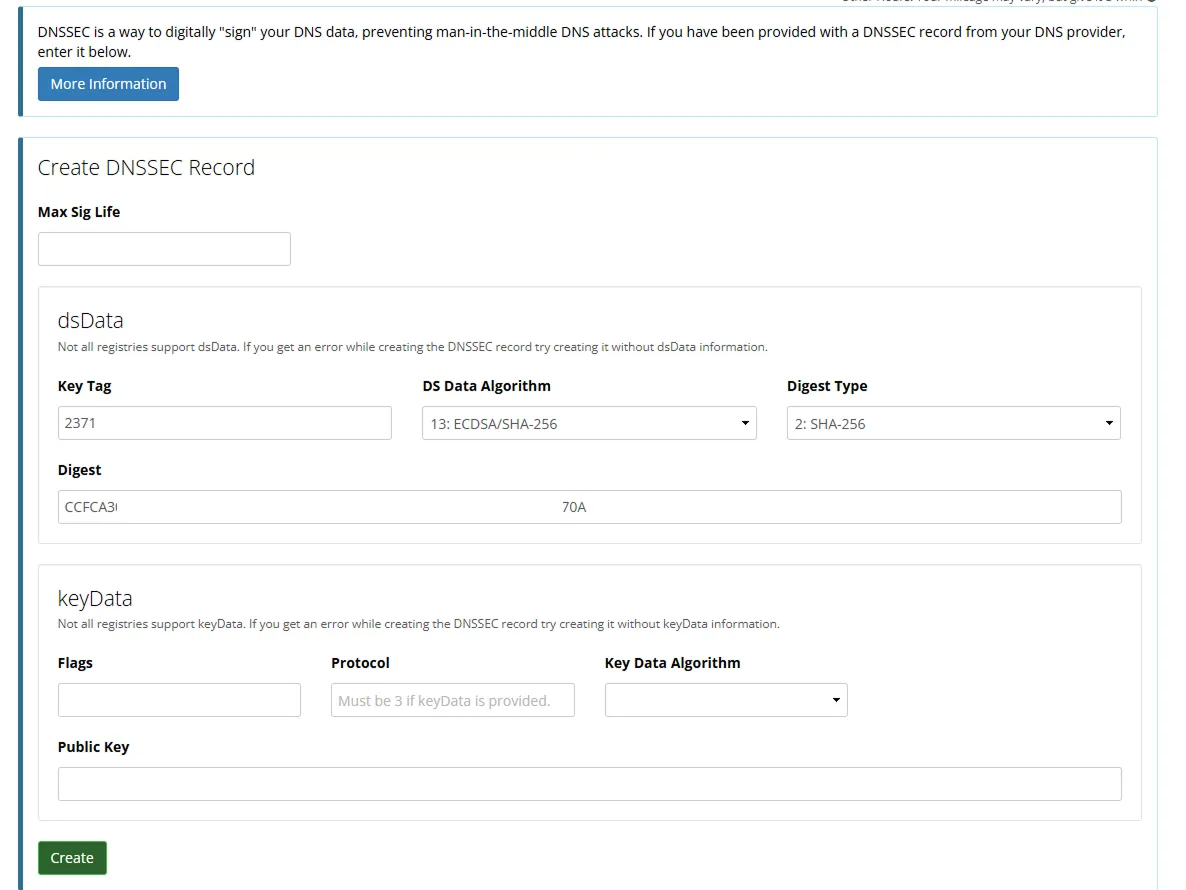
- The final setup looks like this.
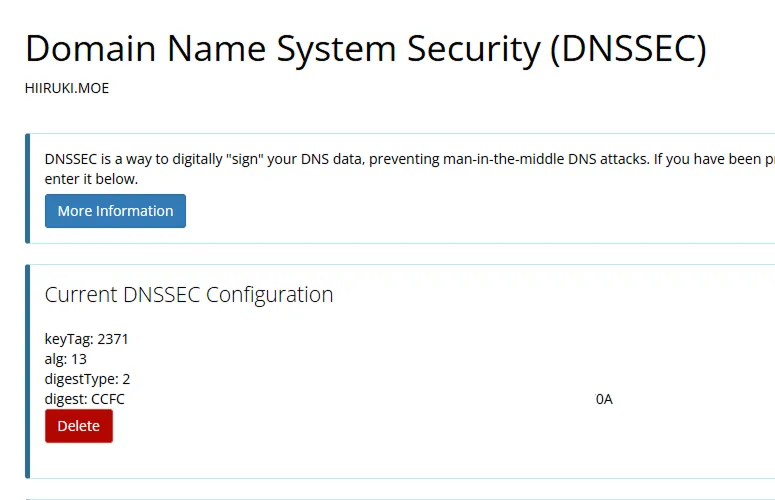
DNSSEC Status in Cloudflare
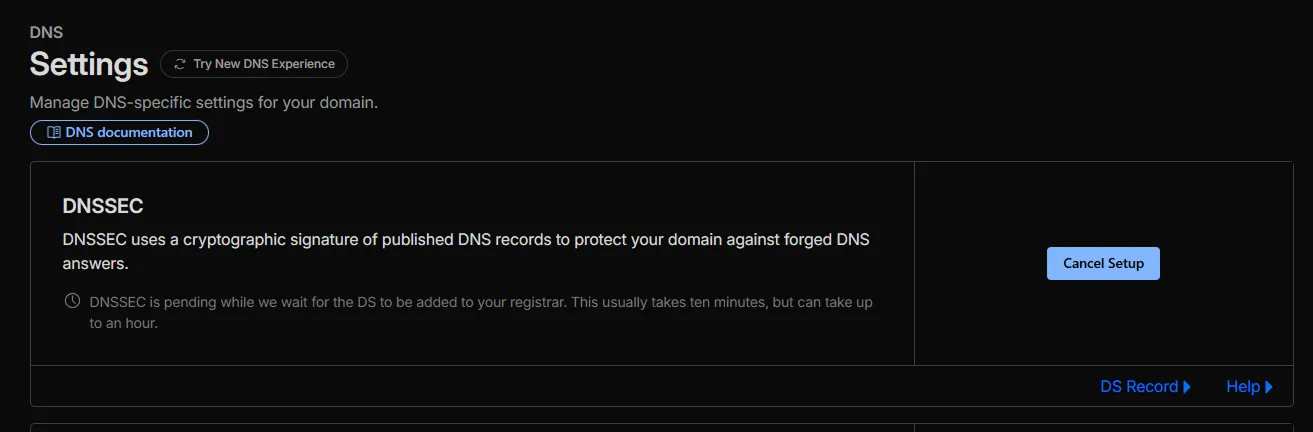
Wait for the DNSSEC to be propagated, this will take some time. The DNSSEC status in Cloudflare will show as pending.
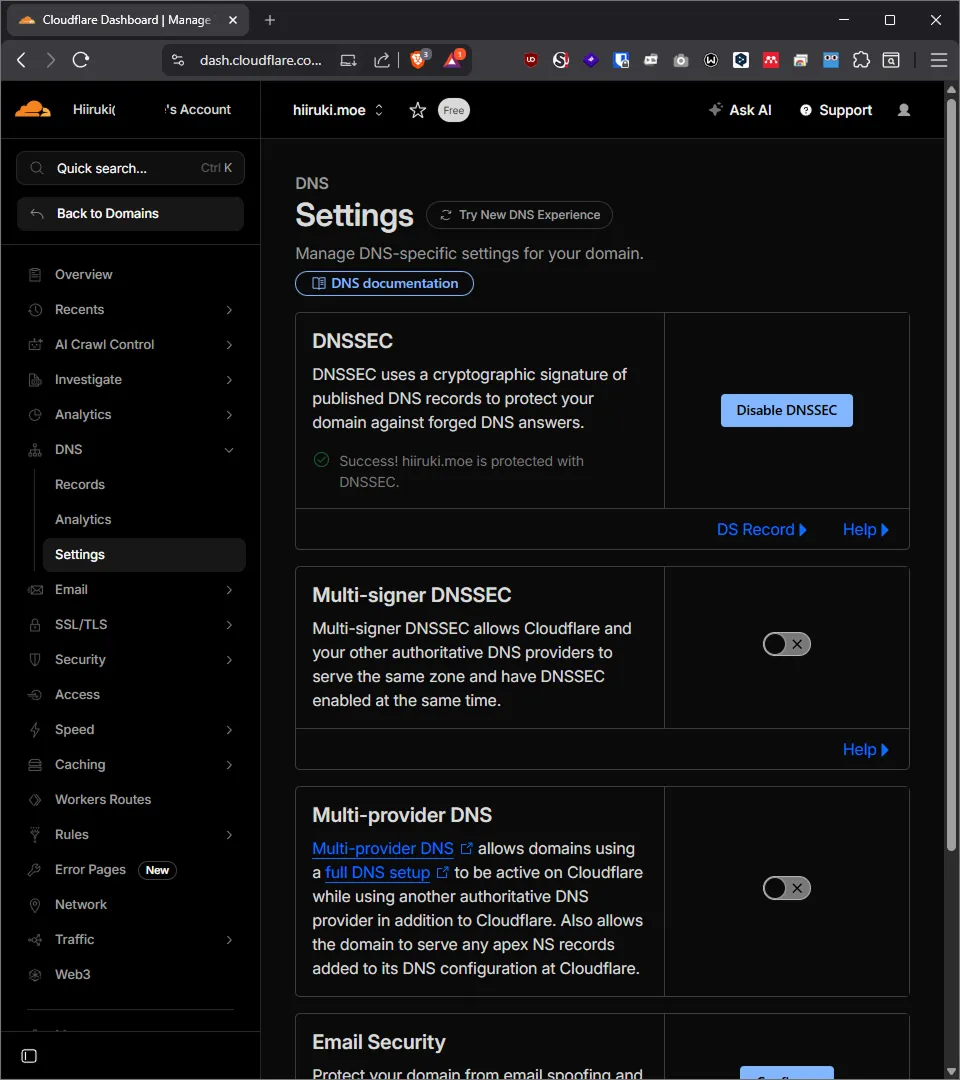
After setting it up in Porkbun, Cloudflare will automatically detect the changes and activate the DNSSEC in a few hours. The DNSSEC status in Cloudflare will change to Success! [website-name] is protected with DNSSEC. and the button will change to “Disable DNSSEC”.
Testing
You can use web-based tools to test DNSSEC, such as DNSSEC Analyzer. The output for my domain looks like this:
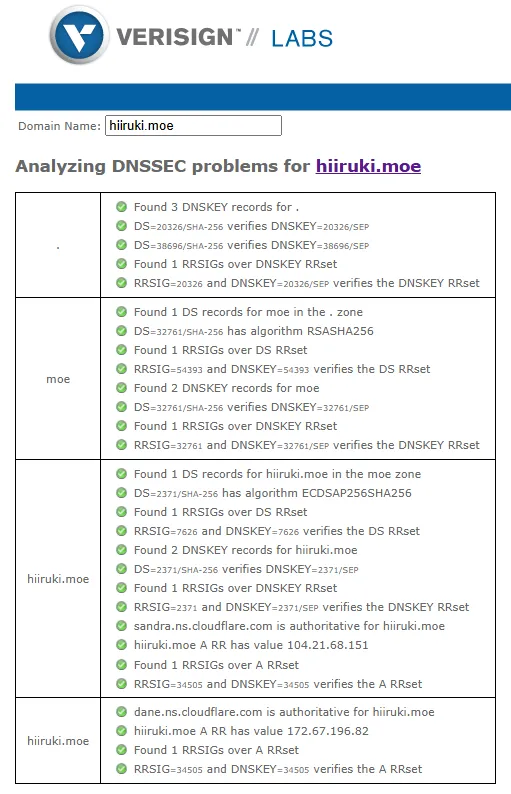
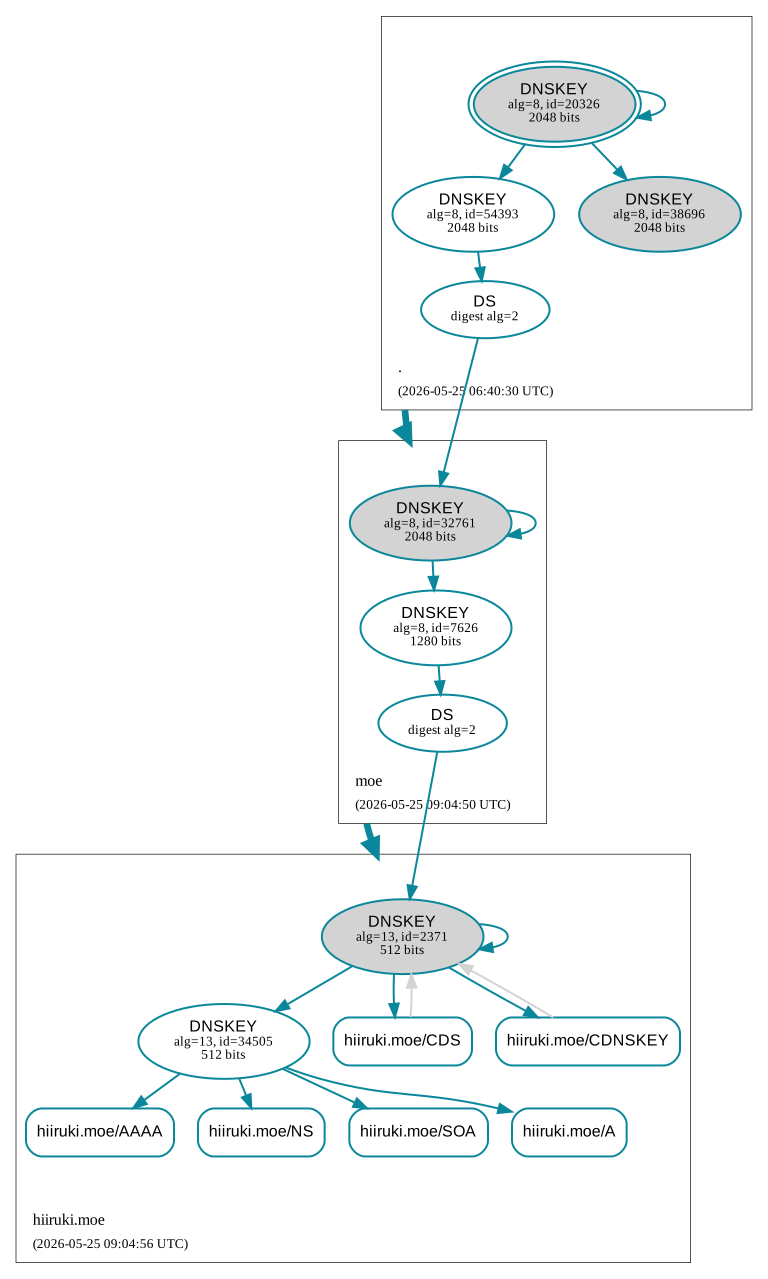
DNSViz can also provide more detailed information about DNSSEC validation with better visualization. The output for my domain looks like this:
You can also use CLI or command line tools to check the RRSIG and other DNSSEC records, such as dig or delv:
dig +dnssec hiiruki.moe dnskey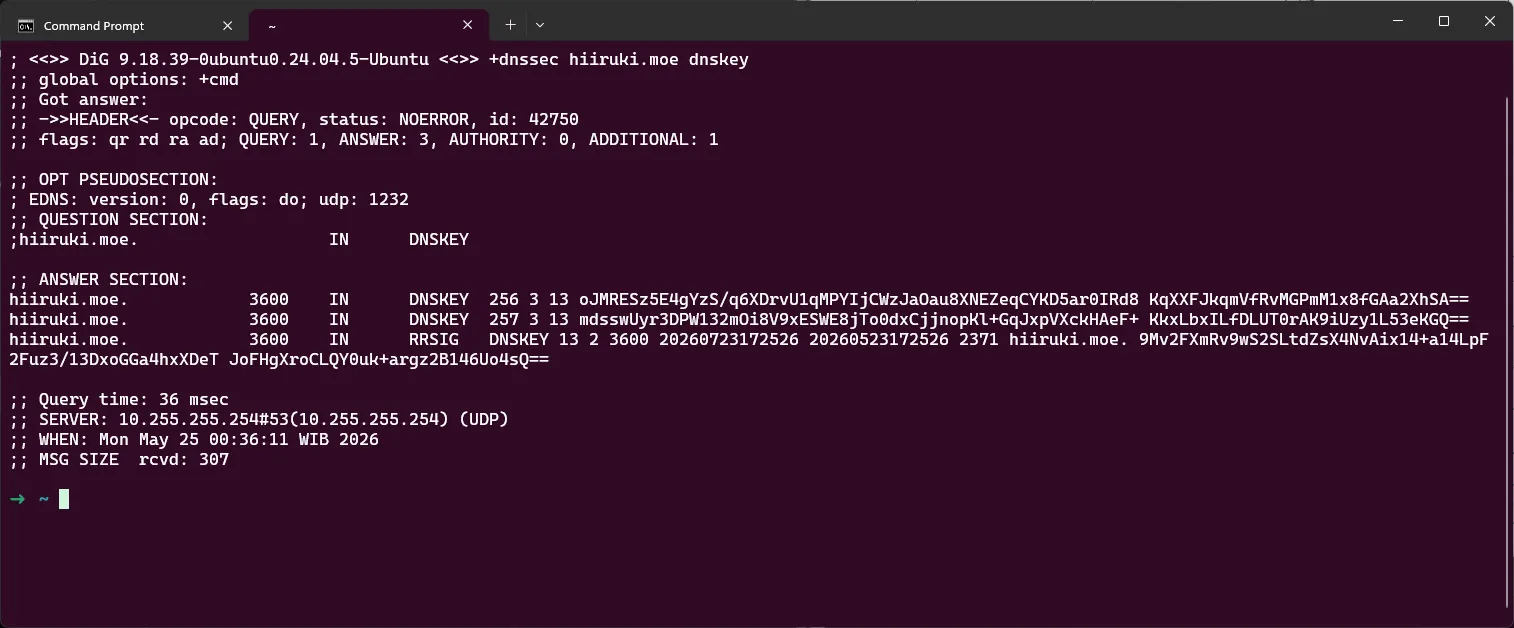
Make sure the output contains the RRSIG record, which is the signature of the DNS record, and the ad (Authenticated Data) flag.
Or using delv to validate DNSSEC locally:
delv hiiruki.moe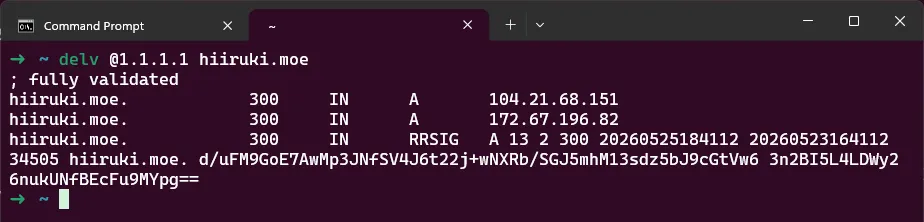
The correct output should show fully validated records with no errors, confirming that DNSSEC is working properly.